Hello there, fellow friends-of-Melodie! As an avid reader of Pink Cupcake Vintage, I was delighted when Mel asked me to guest-blog (even though I'm definitely one of the least interesting people she knows. I reminded her of that, and she STILL wanted me to join in - how nice is that?) So I'm here to help keep the ball rolling while Mel and Matty style-bomb Texas and enjoy some R&R. I have been tasked with putting together a DIY tutorial on some crafts I recently made for our wonderful friend Olivia's baby shower. On with the show!
How to make (cute! inexpensive! easy!) pom-poms:
 What you will need:
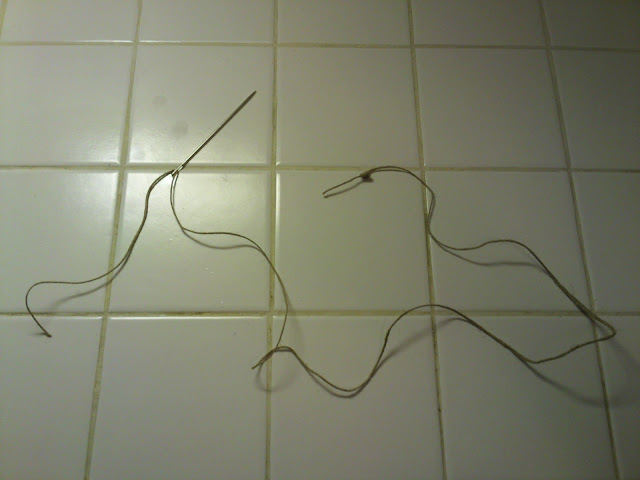
What you will need: 2' length of twine (you can of course go longer or shorter with this, depending on how you're displaying them - I recommend allowing at least 18" for the pom-pom itself, though; and if you're not into twine, the stringing material can be yarn, thin ribbon, or anything you like that's sturdy without being too bulky)
large sewing needle
coffee filters (roughly 50 per pom-pom, and any size filter will work. For this project I opted for the super-big-industrial size; I could use my leftovers to make coffee for everyone at the VFW Hall.)
*Friendly supplies tip - don't even attempt this with plain thread or a wimpy needle, unless you just want to just go ahead and empty your wallet into the swear-jar*
 Step One:
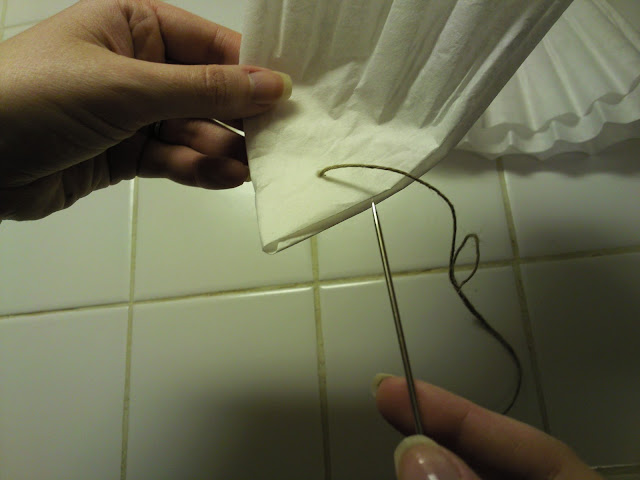
Step One: Knot off one end of your twine. Make sure the knot is substantial - it will be invisible once your pom-pom is made, so it doesn't have to be pageant-ready. Thread the other end through your big giant needle.
 Step Two:
Step Two:Grab a filter and get going. Fold your filter up into a loose quarter or sixth - the fluffier you can leave it, the better it will look when assembled. Pierce through it about an inch away from the pointy tip and string it down to the ugly-twine-knot.
 Step Three:
 Lather, rinse, repeat. Every ten filters or so, squish them all down tightly against the knot and spread them out if necessary. It's easier to shift them around in small sections than all at the end.
 Step Four:
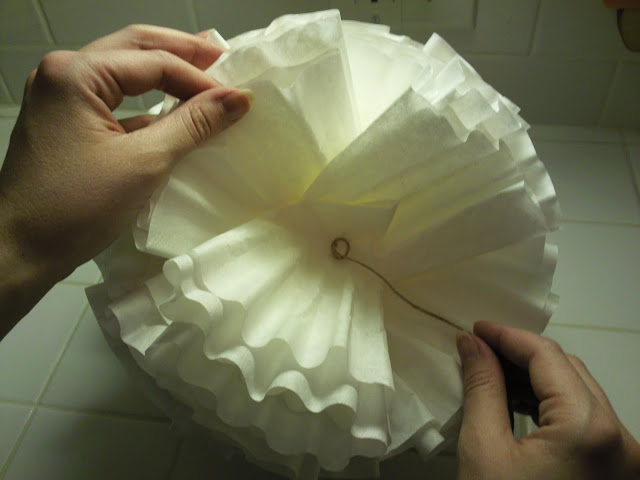
Step Four:Keep on keeping on until you've reached your desired size and shape. Tie that sucker off as close to the top filter as possible so your creation maintains its shape, and voila! Pom-pom city.
 Step Five:
Sip your beverage and admire your handiwork. Ignore your husband when he tells you that this one looks way better than the ones you made with the plain thread and wimpy needle.
 Step Six:
 Step Six:
Hang or place your pom-pom(s) somewhere that your guests can enjoy them.
And that's all there is to it! Projects don't come much easier or cheaper than this, which is why I know how to do it. Have fun stringin'!
6 comments:
Ooooh!! I love this idea, I but you could even dye the coffee filters with tea of food coloring!
Your blog is so fun! I love this pom-pom project. I am definitely want to try this.
Joyce
THIS is awesome! I've made the tissue pom poms before and this looks much easier, in my opinion...and the coffee filters aren't as delicate to work with!
Posting on Kirtsy.com now. I love it!
mary..megan will be thrilled! thank you so much!
Ugh. You are a GENIUS! It's doesn't get any cheeaper/cleverer/prettier!
super cute...and they look awesome. I tried to make some once with tissue paper...but these look a whole lot better. So noted :)
Post a Comment